A Little Knotty Tie
Overview
A Little Knotty Tie is a small scarf in 2 lengths with a faux knot that keeps it snug around your neck. Designed in Pure Cashmere, it's the perfect small project for this exquisite yarn–and the perfect gift for yourself (or someone you love).
Sizes & fit
The shorter length (about 24.5”/61.5 cm) wraps around your neck once, and is inspired by vintage designs of old. The longer length (about 40.5”/61.5 cm) wraps around the neck 2 times.
Customization
A Little Knotty is easily customizable. If your gauge is close to the prescribed gauge of 15 rows over 2”/5 cm, adding an additional motif section of 24 rows will add about 3.25”/8 cm to your overall length. If you’re using our cashmere and getting gauge, one full motif of 24 rows should take about 2.25g of cashmere (note that weights may change with humidity.)
Yarn Substitutions
Natural, 100% pure cashmere is divine, but it’s also expensive, and so yarn substitutions will often be required. Because Cashmere blooms when blocking, it’s not easy to know what you’ll get if you sub out a wool, for example. We recommend swatching and blocking your swatch. Our testers found that knitting with a Sport Weight non-cashmere yarn required them to go up a needle size or two, typically resulting in a longer scarf.
Blocking
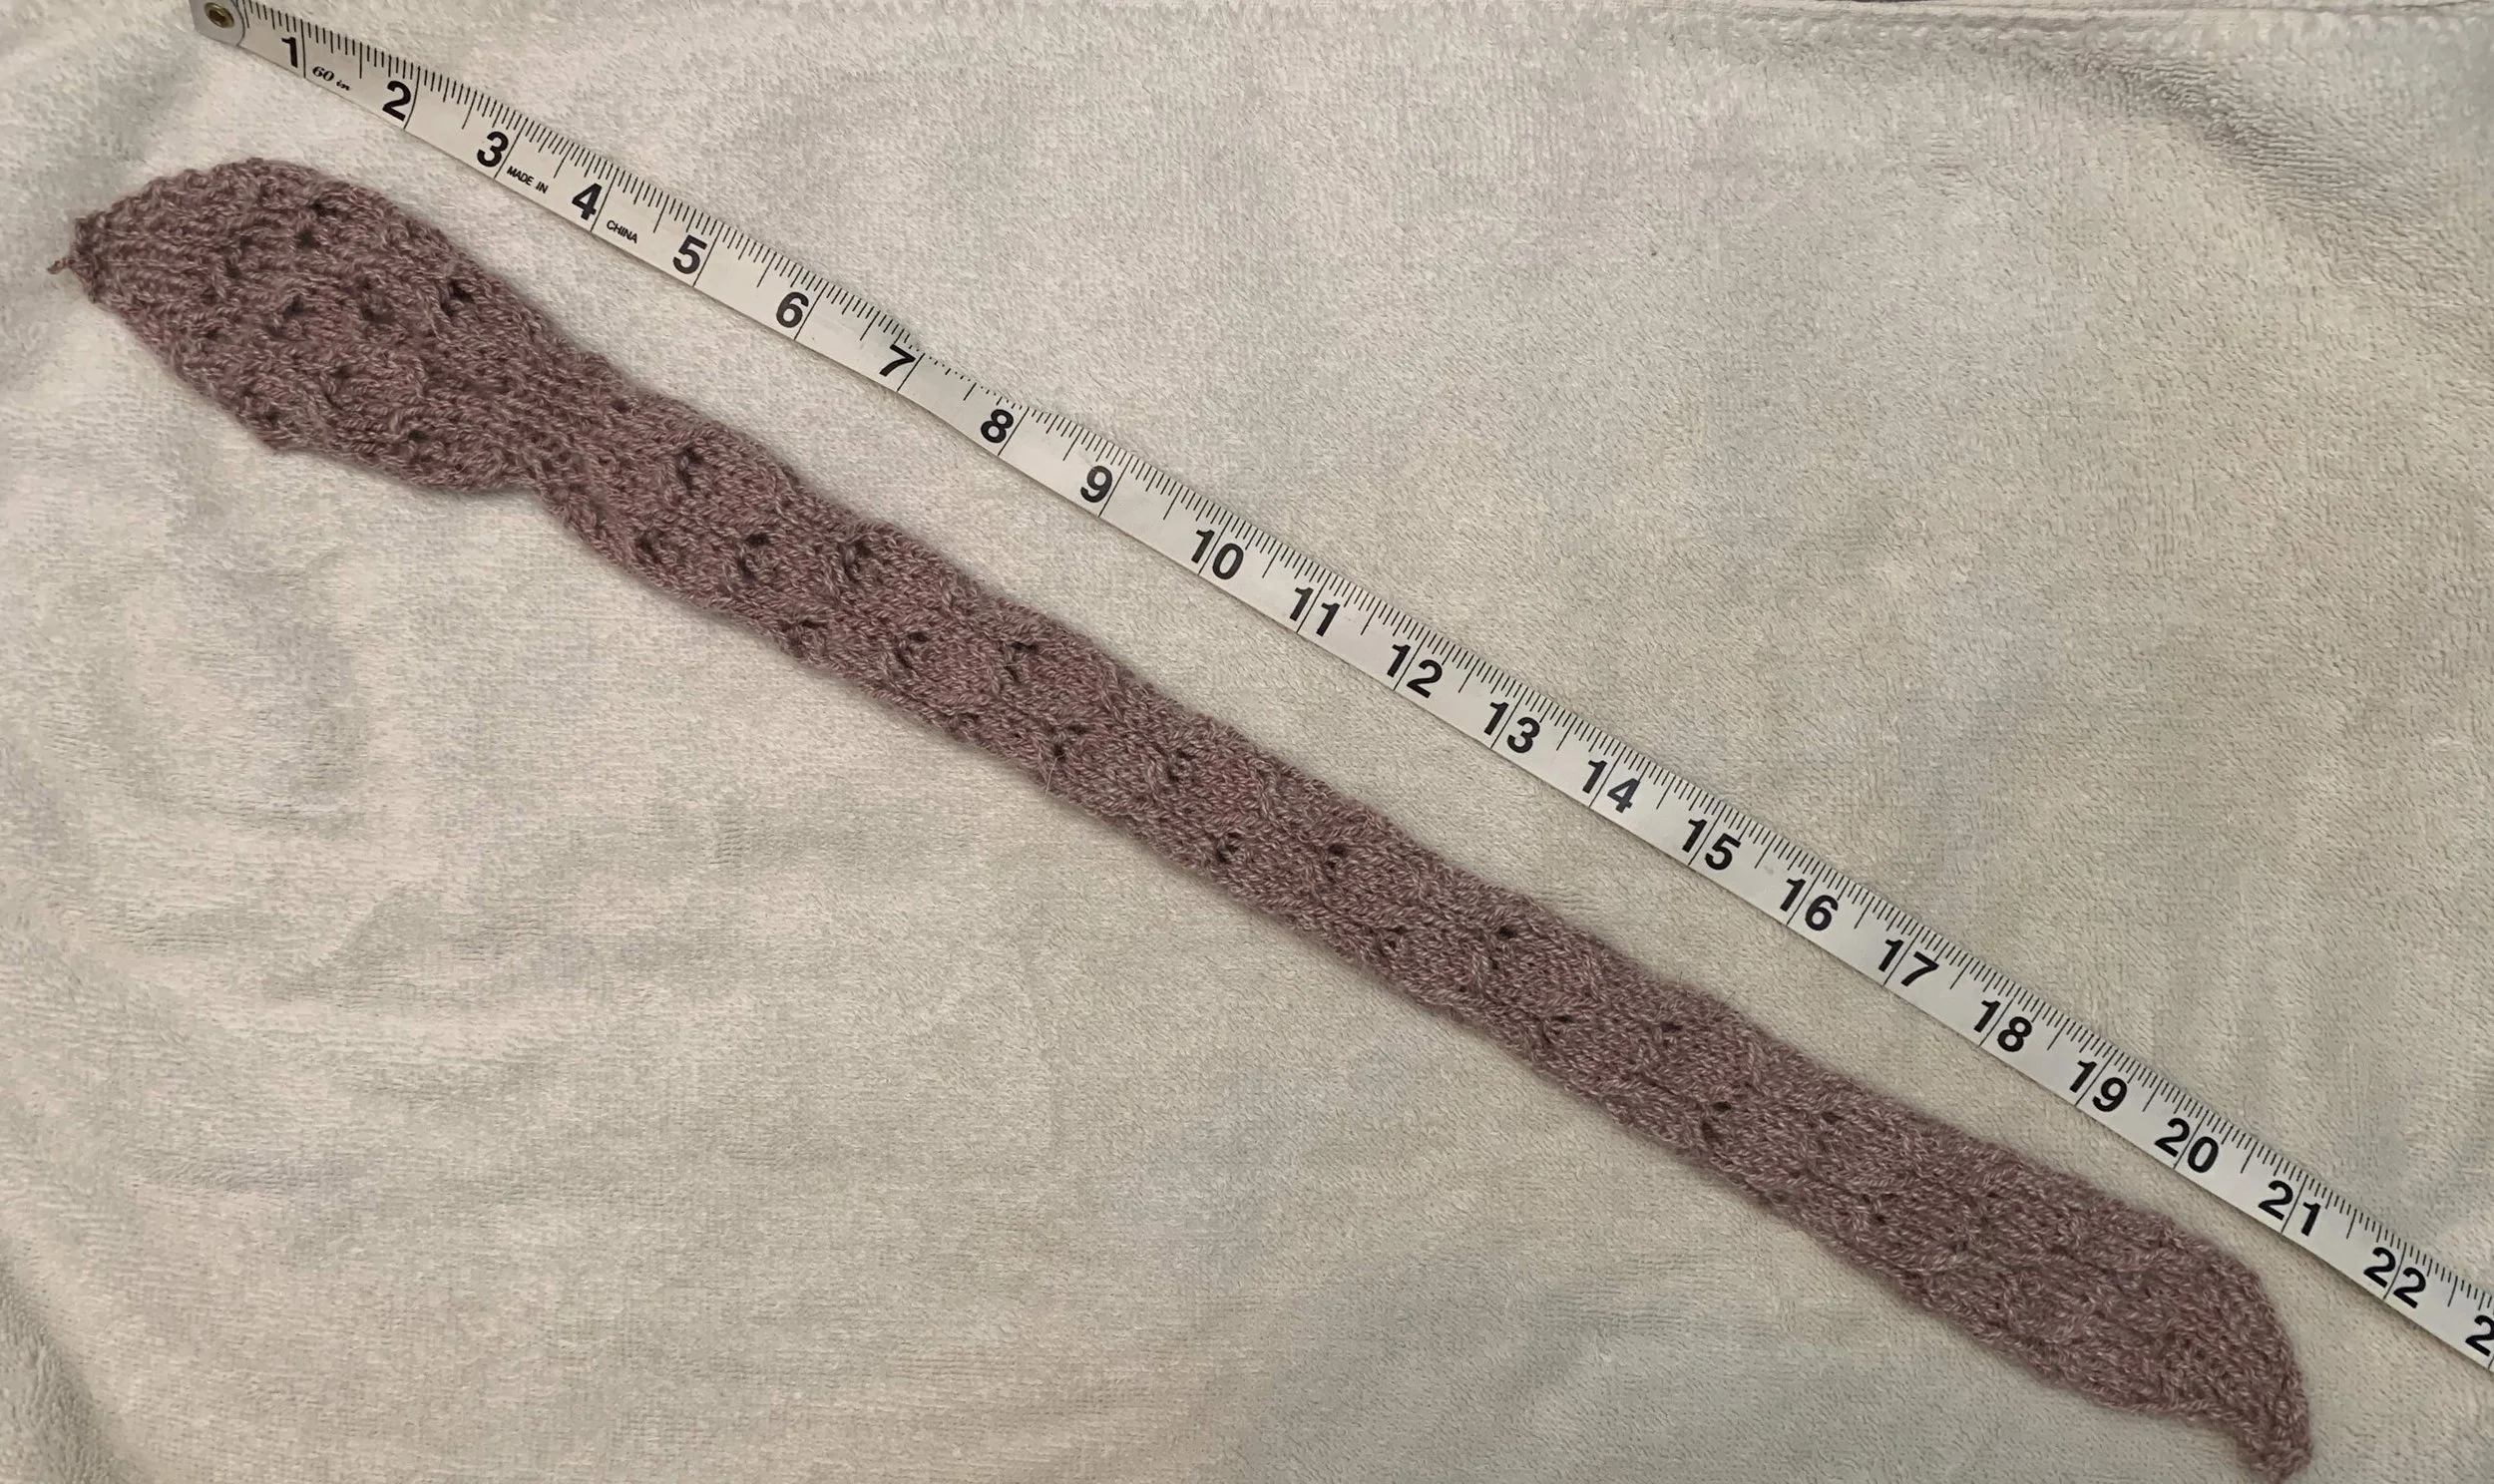
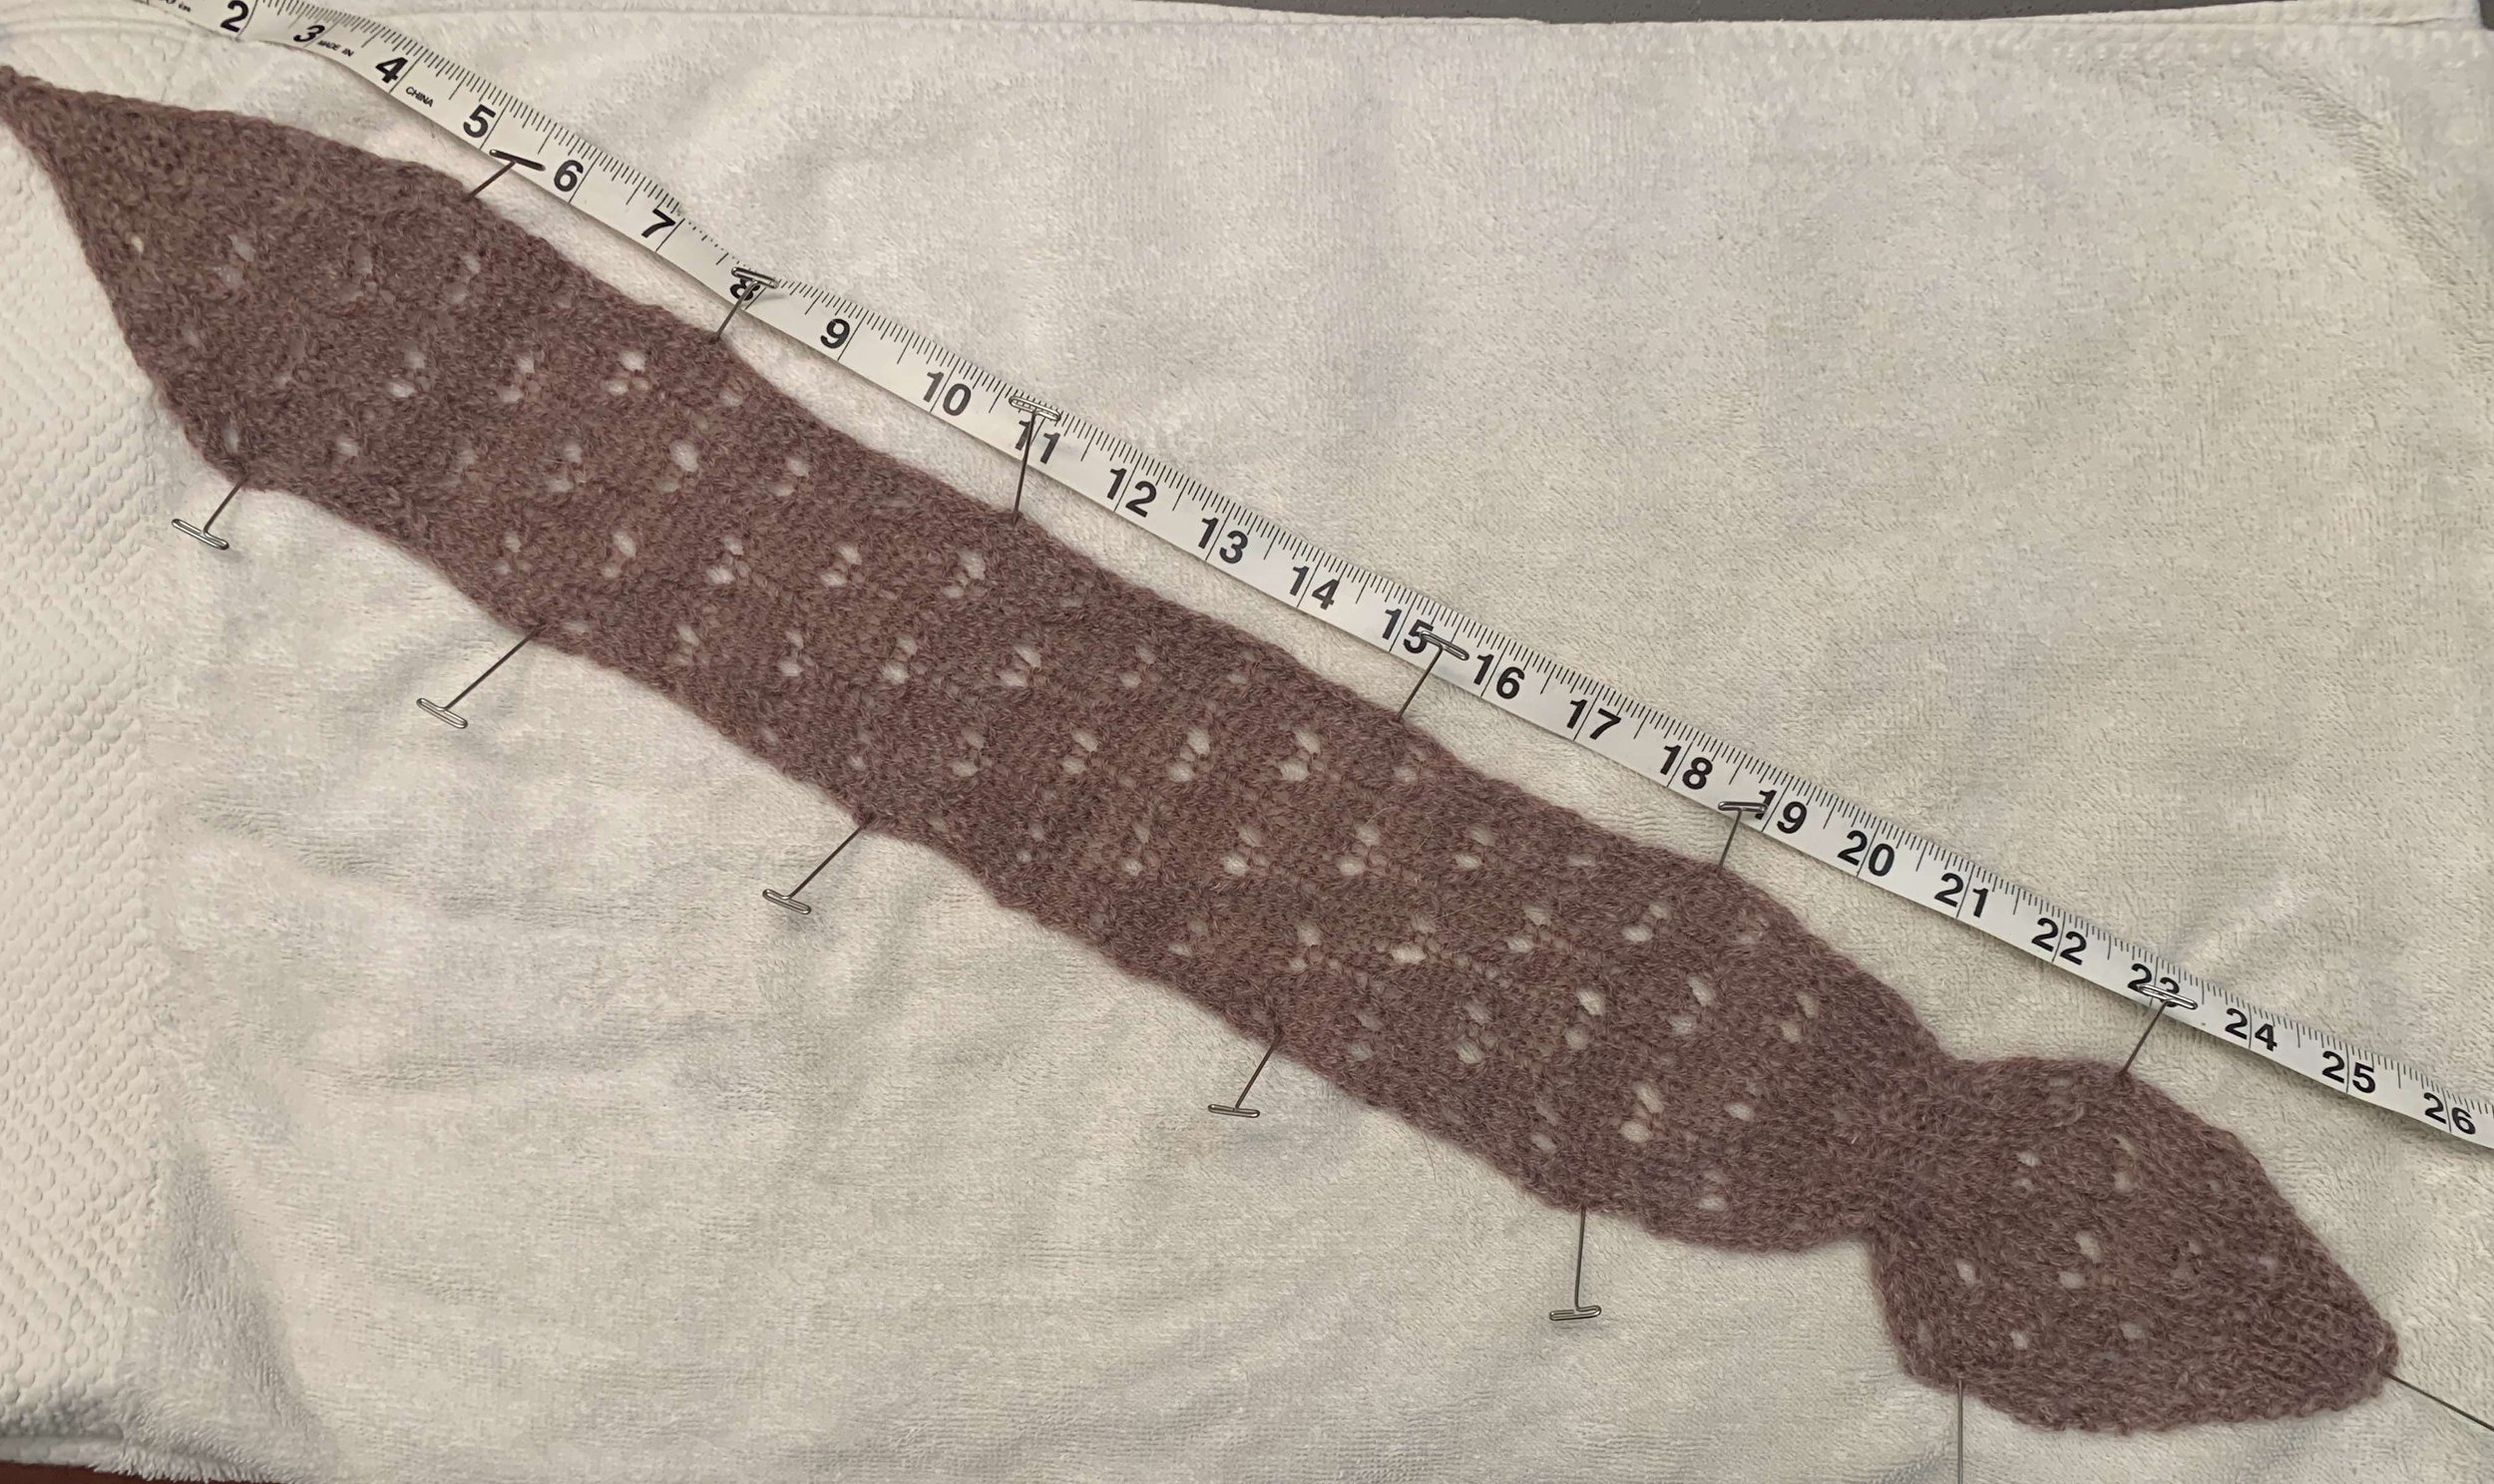
Cashmere blooms when blocking, meaning the un-blocked lace will look different than the blocked lace. Additionally, the tie will grow a lot in length when blocking, and T-pins can be used to achieve your desired shape. Alison’s Cashmere version blocked out from 22” in length to about 26”, as seen below.
Styling
We’ll be posting some photos here shortly with how we like to style this tie that kinda looks like a tie!
Stitch Discussion
You may have noticed the unique yarn overs in this project, and wondered what’s going on. Whenever you have yarnovers between knit & purl stitches, some special care needs to be taken. (Note: It doesn’t NEED to be taken, you can just do your yarn overs as normal if you’d like, but the method described here and used in this pattern will make your lace look tidier and more uniform.)
In this pattern, our repeated lace row is:
[K1, k2tog, yarnover, p1, yarnover, Ssk]
If you were to carry the yarnovers around the needle in the normal direction, you’d end up with the first yarnover being much larger than the second. Why is that? Take a look at the images below. You’re carrying the yarn from behind the work all the way around the needle’s full circumference, and then bringing it forward to work the next purl stitch.

Looking at a cross section of the needle, we can see this clearly.

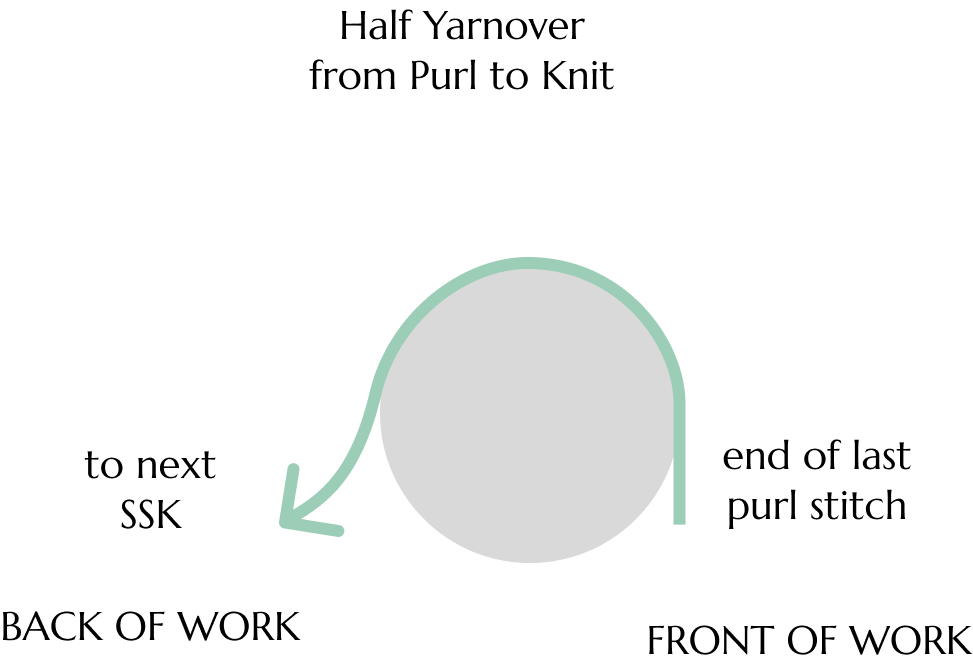
Looking at the second yarnover, we’re going from a purl stitch where the yarn is at the front of the work over the needle to the back of the work for the next knit-type stitch. In this case, the yarn only travels roughly half a needle circumference, and we refer to this as a Half Yarnover. Take a look at the images below.

A cross section shows this clearly.
Thus, the first yarnover will make an extra large hole in the lace, dwarfing its partner. You may have even seen this in your lace before and wondered what in the heck was going on. Take a look at the image below. The top lace section uses these traditional (super-sized) yarnovers for the first yarnover, then a purl stitch and the half yarnover from the purl to the next knit-style stitch. You can see how uneven these yarnovers look.
So how do we improve this? The goal is to make the length of the yarnover the same for both stitches, and the easiest way to do that is to mirror the half yarnover that occurs after the purl stitch. We call this the Reverse Half Yarnover. It’s a half yarnover because it’s covering half the circumference of the needle, and it’s “reverse” because we’re wrapping the yarn in the opposite direction, resulting in a twisted stitch that must be untwisted in the next row.

(A brief digression about names: we’re not sure anyone has good names for these, so you probably won’t see these names anywhere else in the knitting universe. But we like them because they describe the mechanics of what is happening, and differentiate between the different yarnovers.)
The Reverse Half Yarnover
How you think of the reverse half yarnover depends on your knitting style.
English Style: For those who knit English style, it’s pretty easy. You’ll just work your k2tog decrease, then insert your needle for the next purl stitch. When you bring your yarn over the working needle for the purl stitch, your reverse half yarnover is automagically created!
Continental Style: For those who knit Continental style, it’s just a little trickier. You’ll work your k2tog decrease, then bring your yarn over the top of the needle from back to front (it feels backwards when you’re doing it.) To purl, you’ll hold the yarnover in place with your finger, otherwise the yarnover will just slide off as you purl.
Working into Reverse Half Yarnover on The Next Row: Ptbl
As briefly mentioned above, the reverse half yarnover is a twisted stitch, meaning it’s sitting on the needle the wrong way around from all its friends. When you come to the stitch on the next row, this becomes quite obvious.
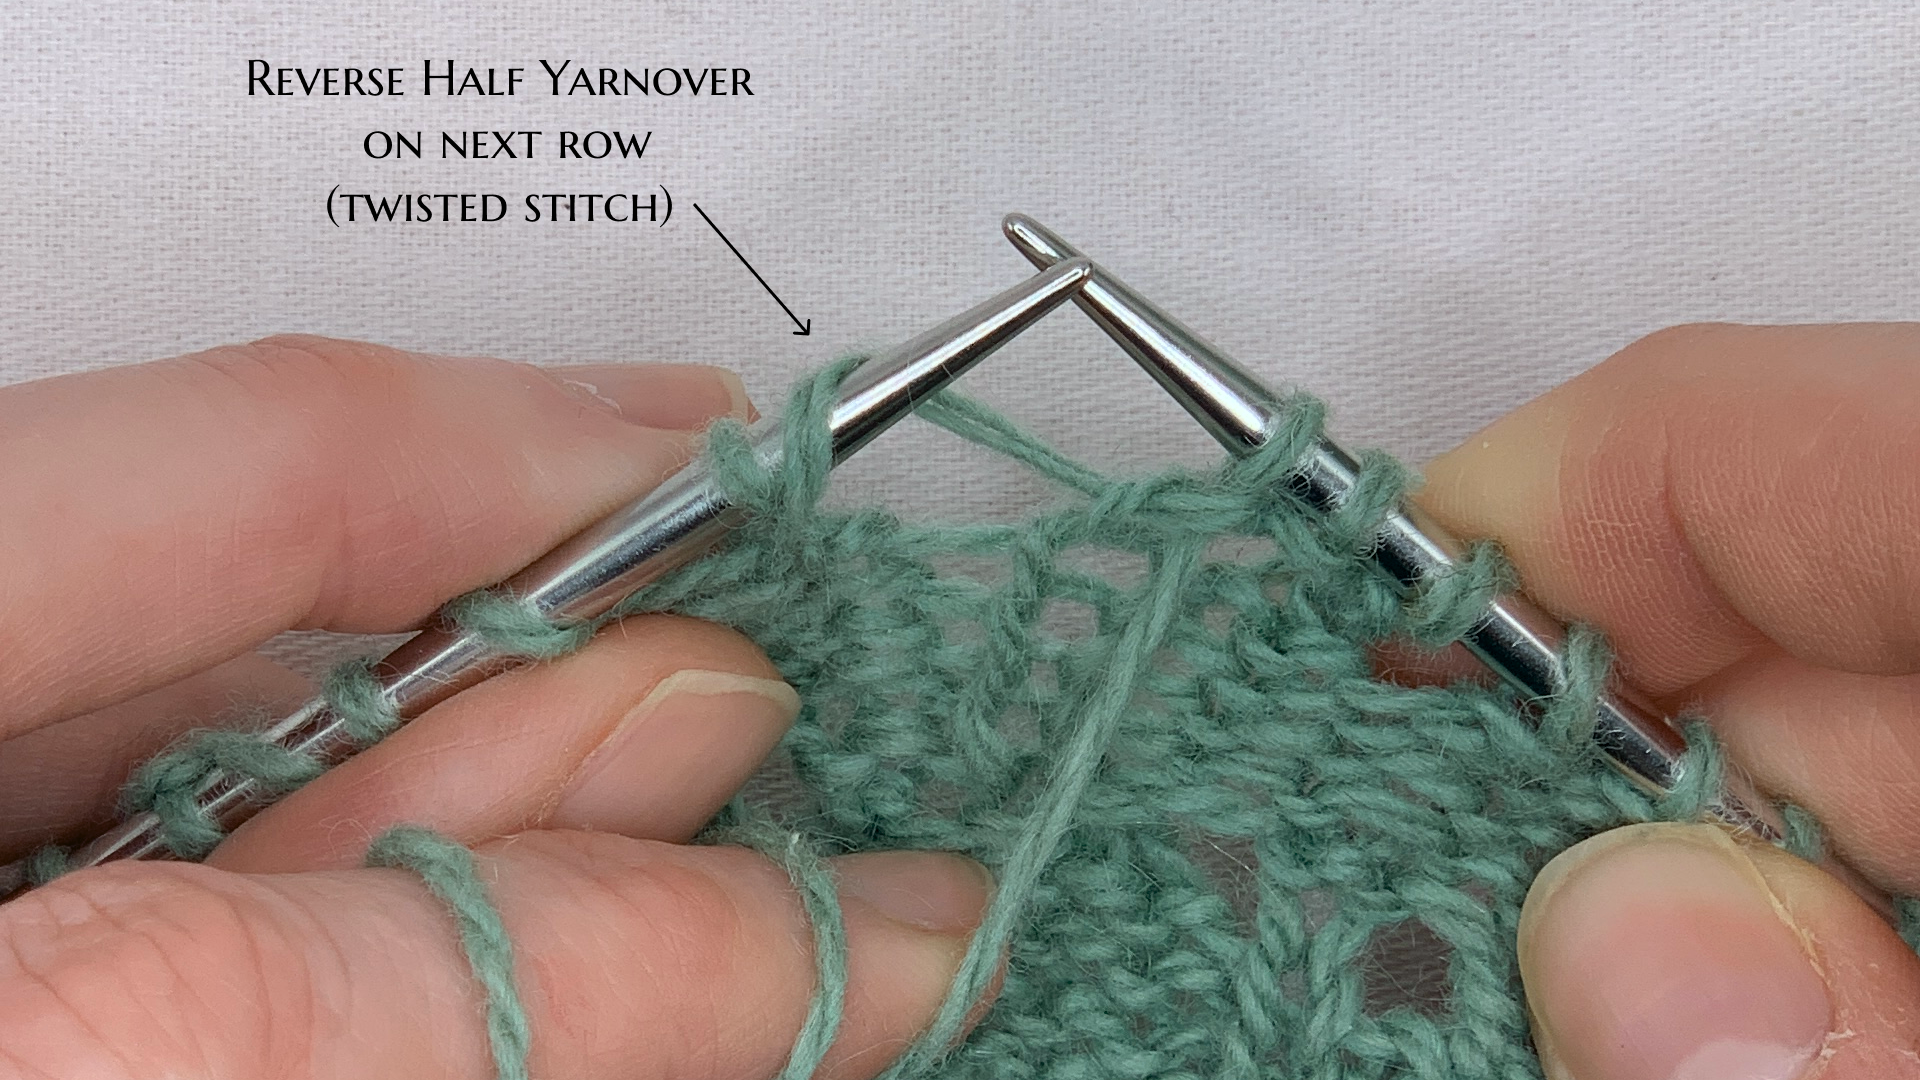
But never fear, it’s simple to resolve this stitch. You have two options:
(1) Turn it around before working it, and place it back on the holding needle.
(2) Work it through the back loop.
We generally suggest working through the back loop, as it’s not difficult once you know what to do, and it is fewer steps!
Not sure what we’re talking about? It’s A Little Knotty Tie, available exclusively in Knitrino. To get the pattern, open Knitrino or click the image below from your phone. 📱