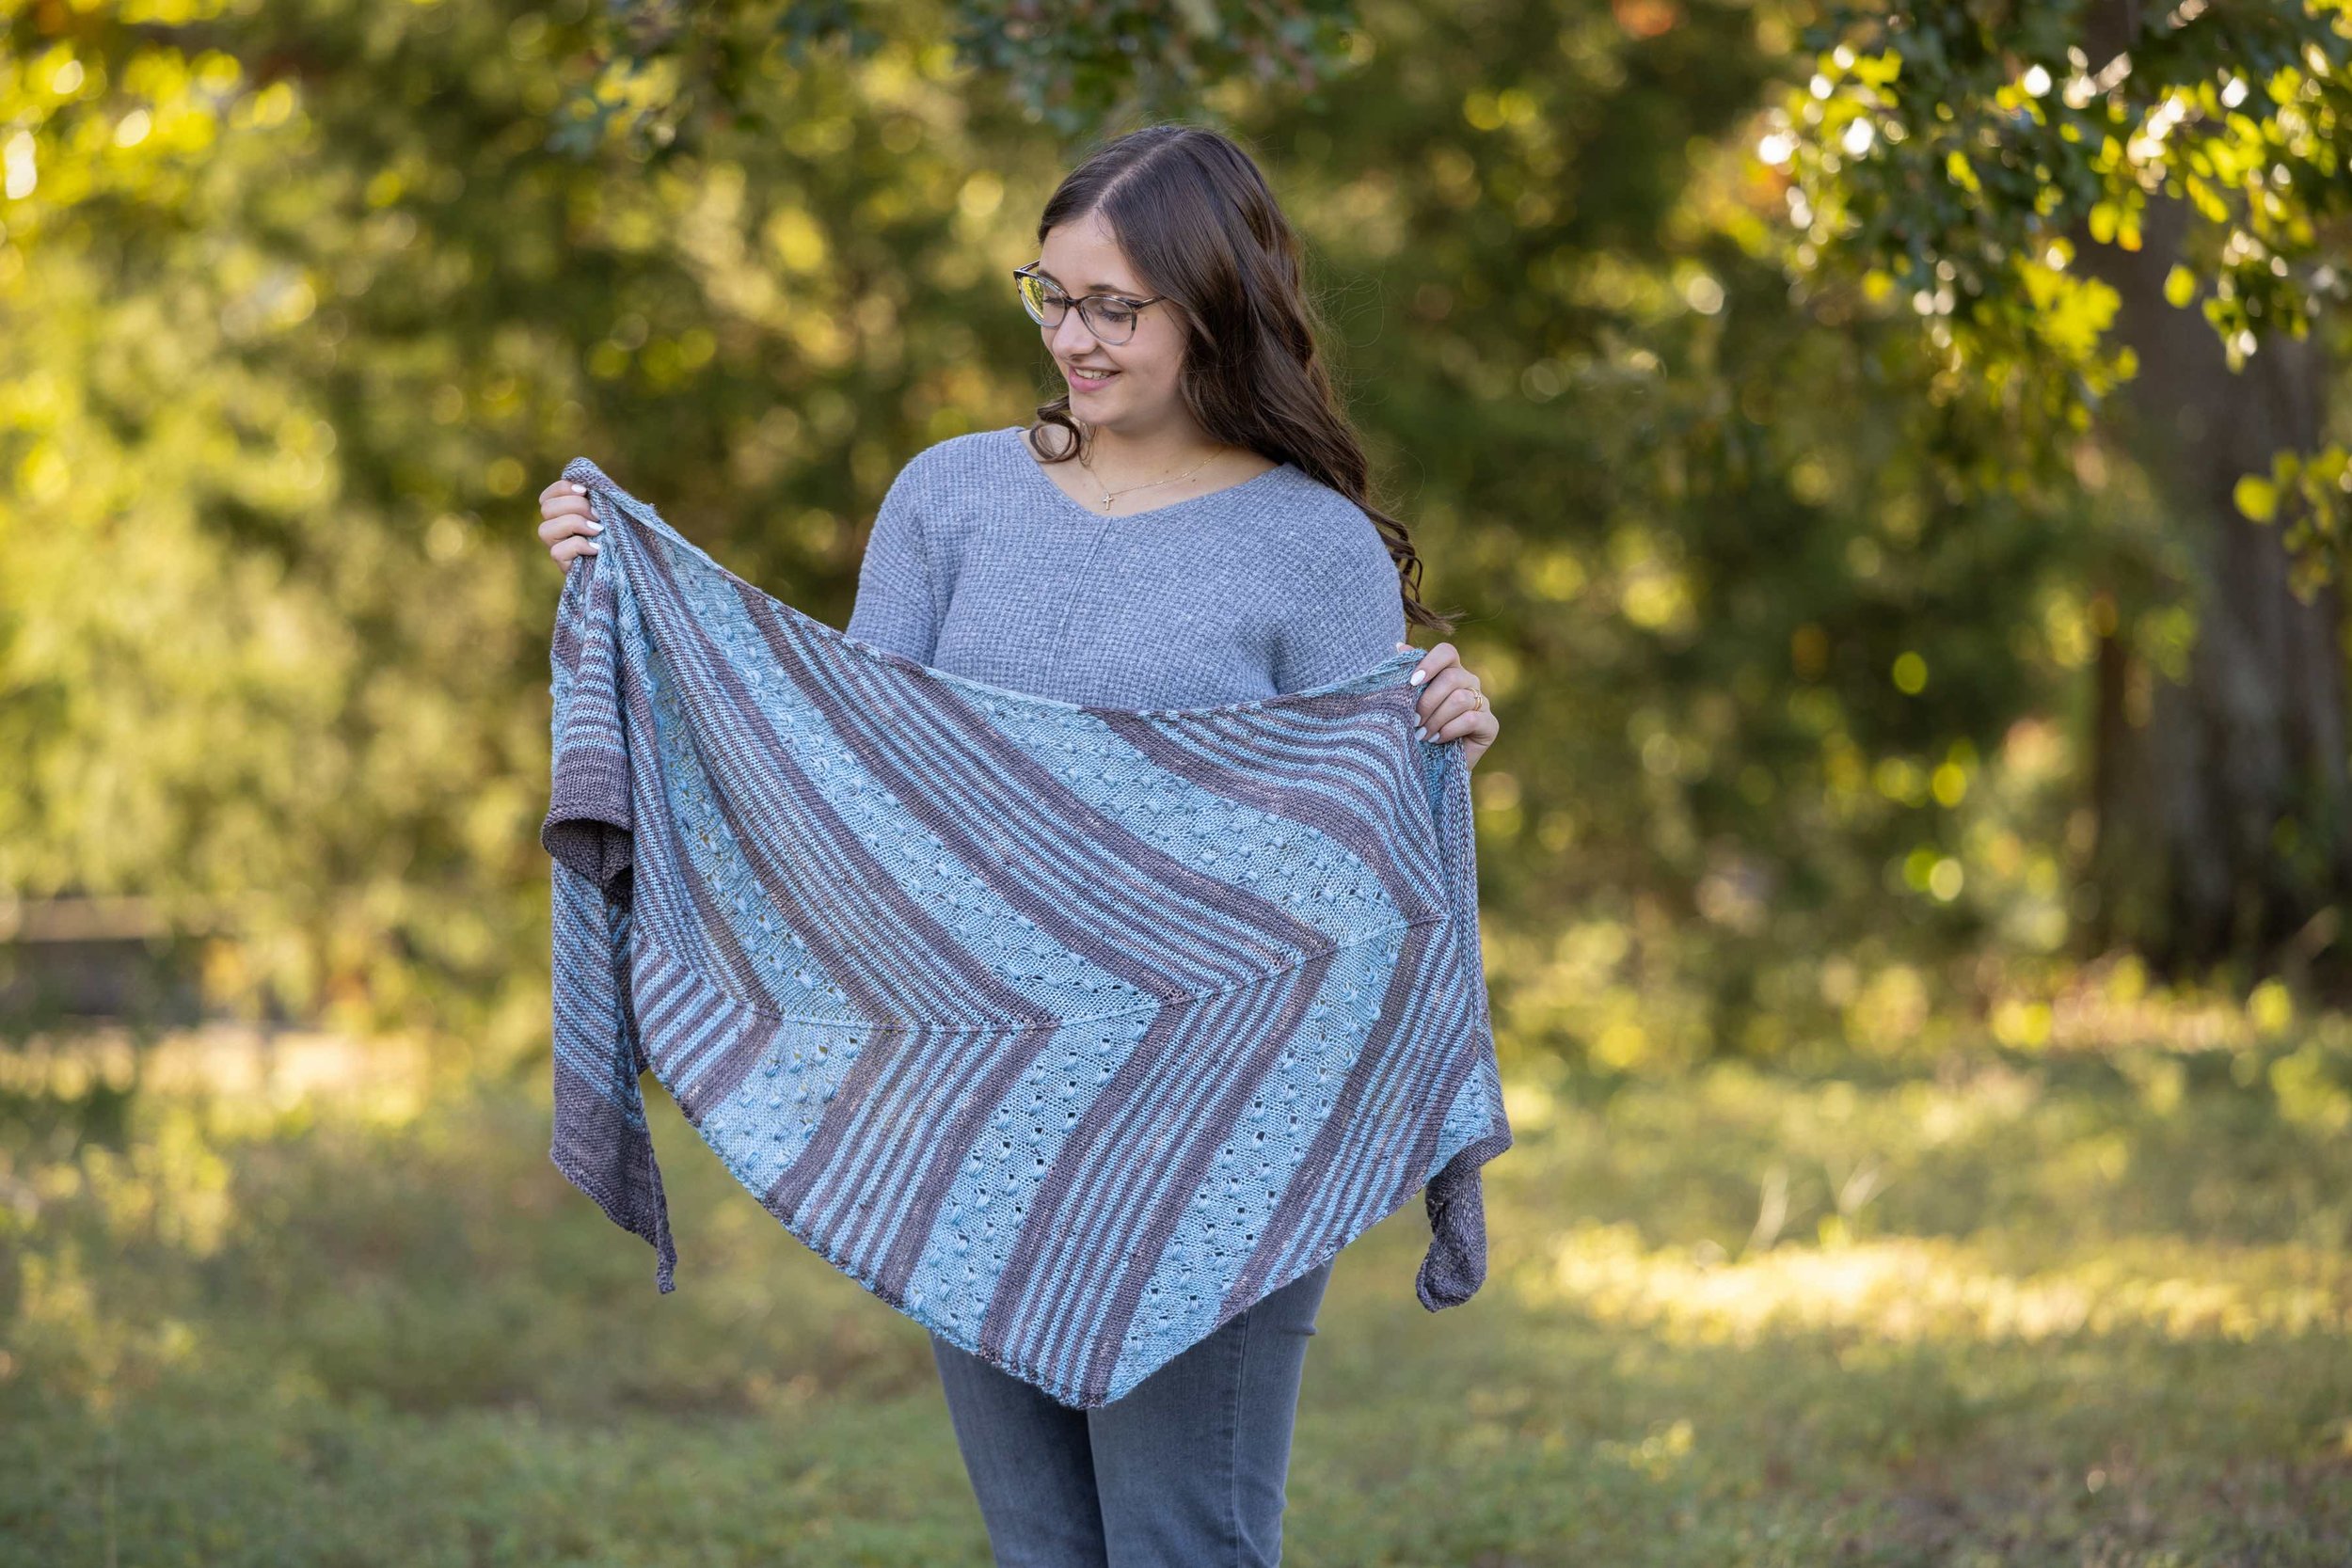
Field & Sky Shawl
This article contains tips for Field & Sky Shawl, the stunning new shawl from Knitrino. Don’t have the pattern yet? It’s available for a limited time in Knitrino–click the button below from your phone to get the pattern.
As always, if you have any questions about this pattern, please email us at support@knitrino.com.
Table of Contents
Getting Started with Knitrino
If you're new to Knitrino, check out the Quick Start guide for short videos that show you how to use Knitrino. Those new to chart knitting may wish to review our full blog post on Reading Knitting Charts.
Reading the Charts when Working Back & Forth
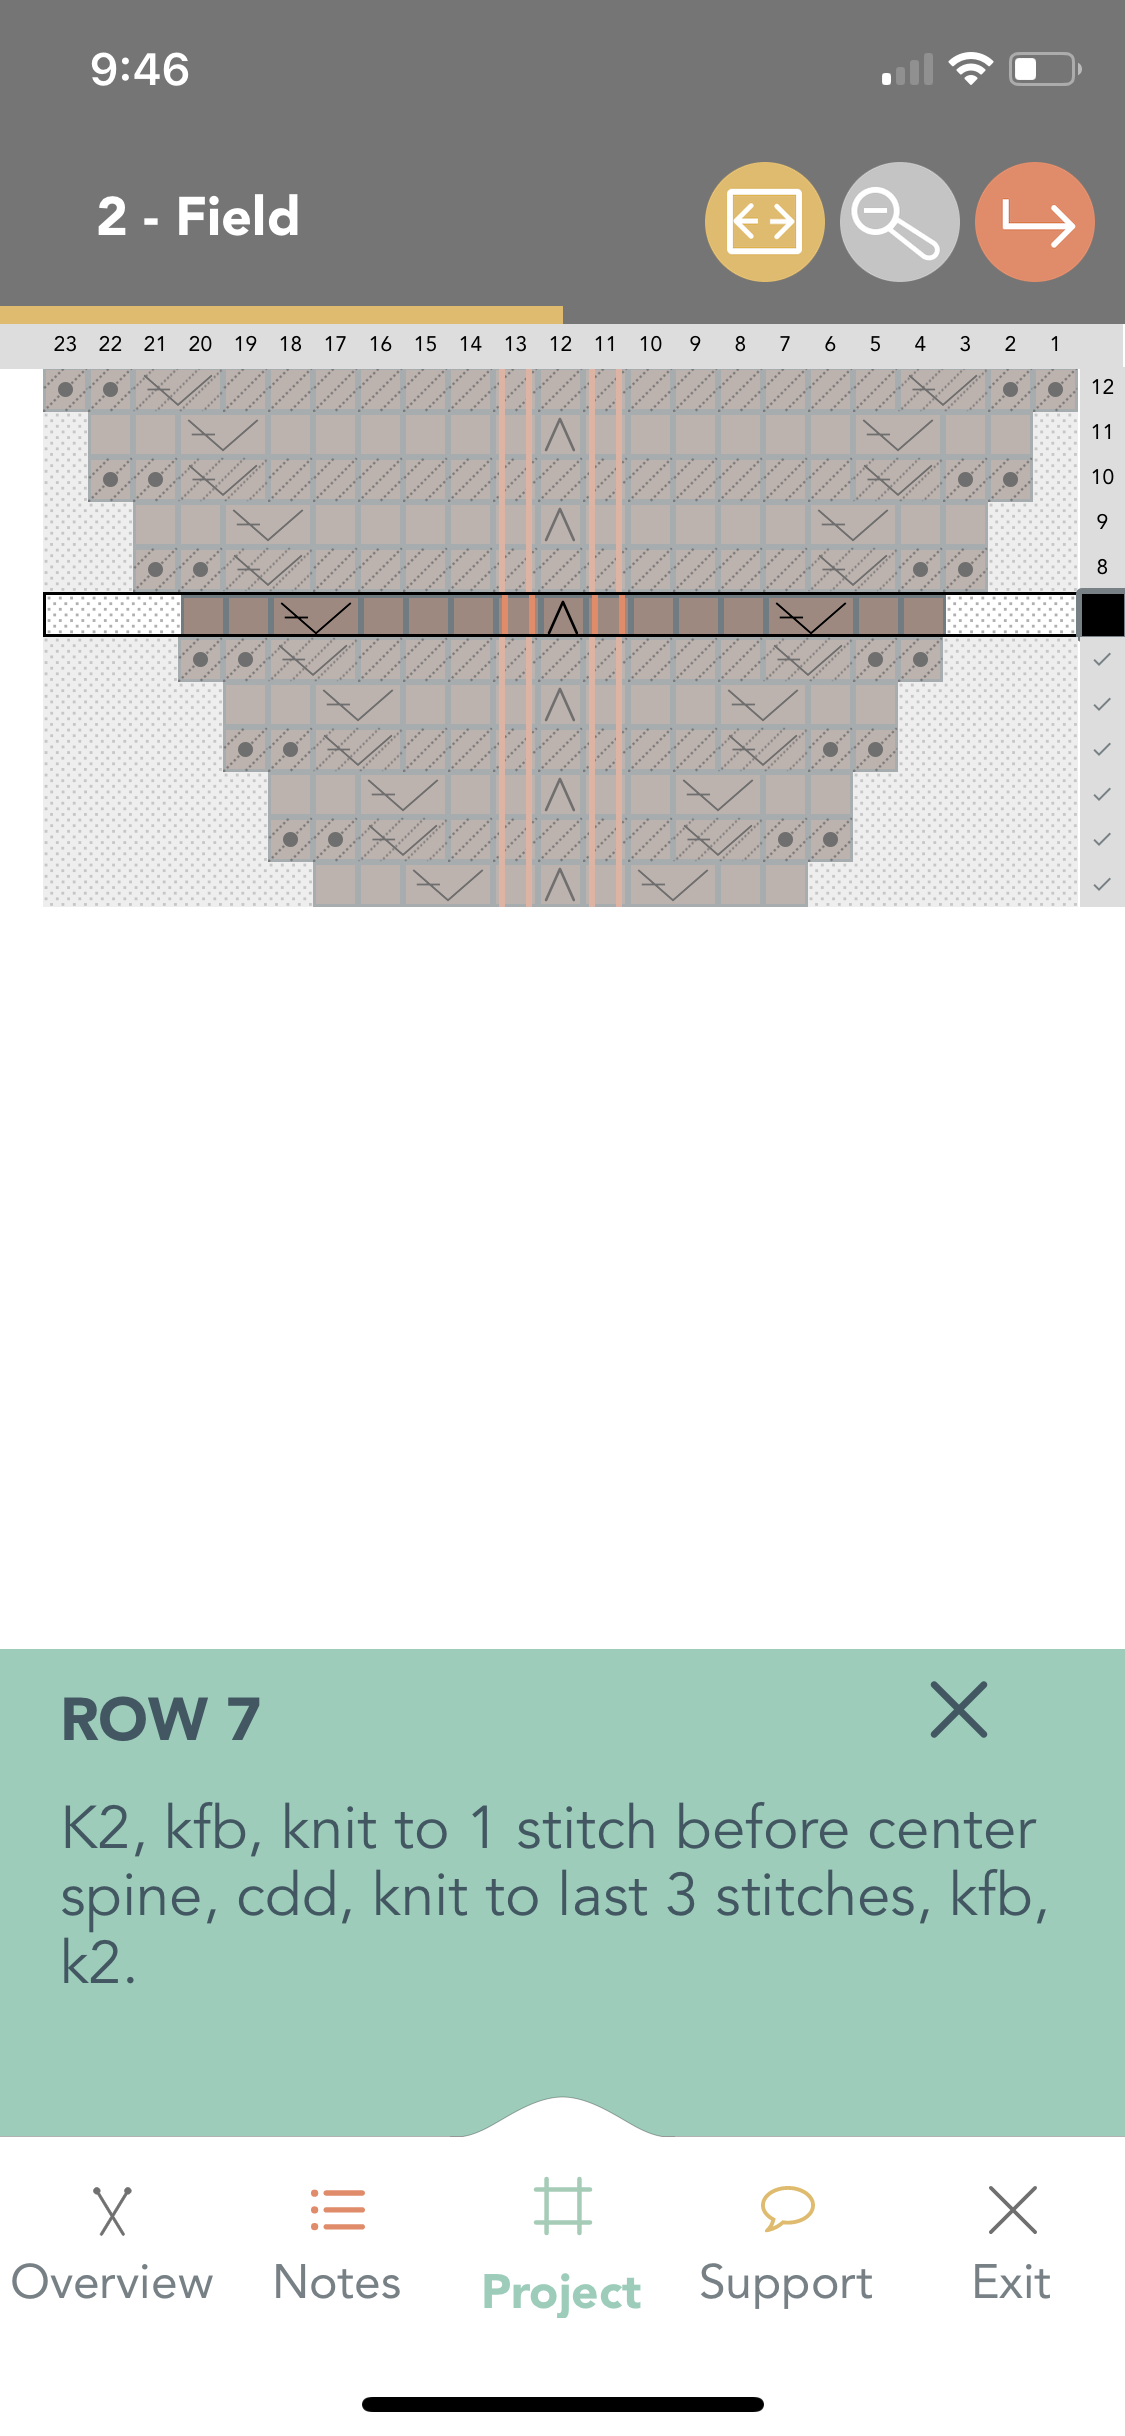
When working flat or back & forth, you read the chart like a zig zag. When you work across the front of the work (odd-numbered rows), you read the chart from right to left. When you work across the back of the work (even-numbered rows), you read the chart from left to right. This is just like what you’re doing in the physical world. You work your knitting across the front then turn your work and work the opposite direction across the back. (Note: both right-handed and left-handed mirror knitters should read the chart the same way. For right handed knitters, it matches how you’re working. For left handed knitters, your work will be mirror image.)

Now, when you work a knit stitch on a wrongside or backside row, that looks like a purl stitch on the front-think of garter stitch! So a knit stitch on an even (wrongside/backside) row, will appear like a purl stitch on the chart. But it will also be hashed to remind you “This is a backside row.”
Fore more on reading knitting charts, take a look at our full blog post on Reading Knitting Charts.
Construction
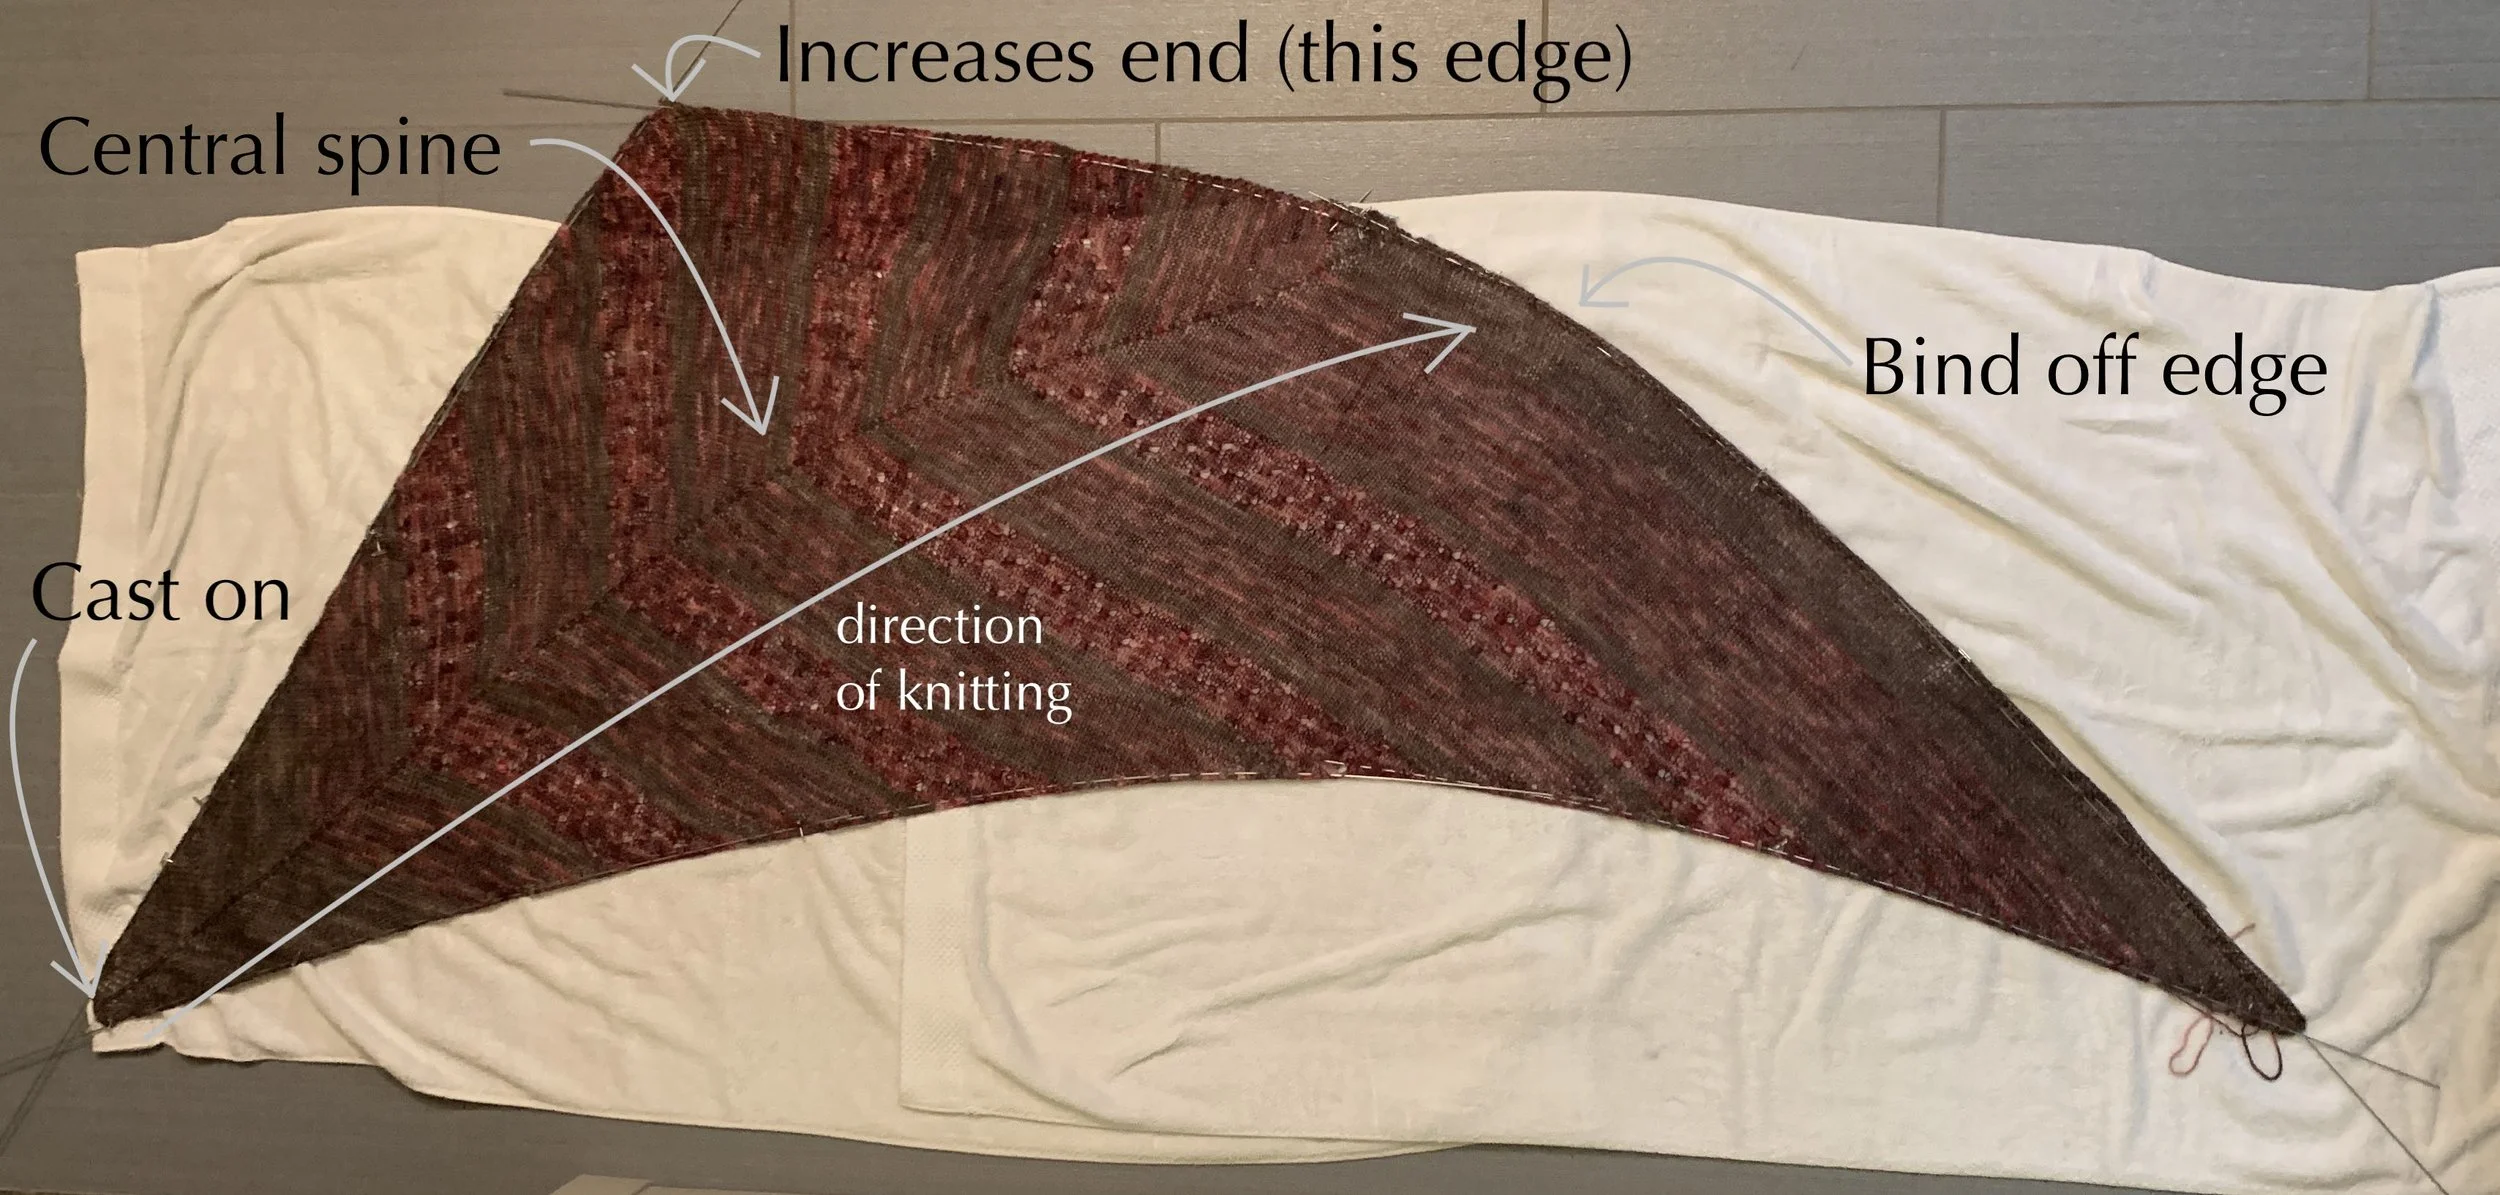
This shawl is shaped in two phases. First, you'll cast on a few stitches for the tip, increasing evenly on both sides every row. On right side rows, the increases are offset by the Central Double Decrease (CDD), which creates the central spine and forms the large Chevron-shaped angle of the fabric.
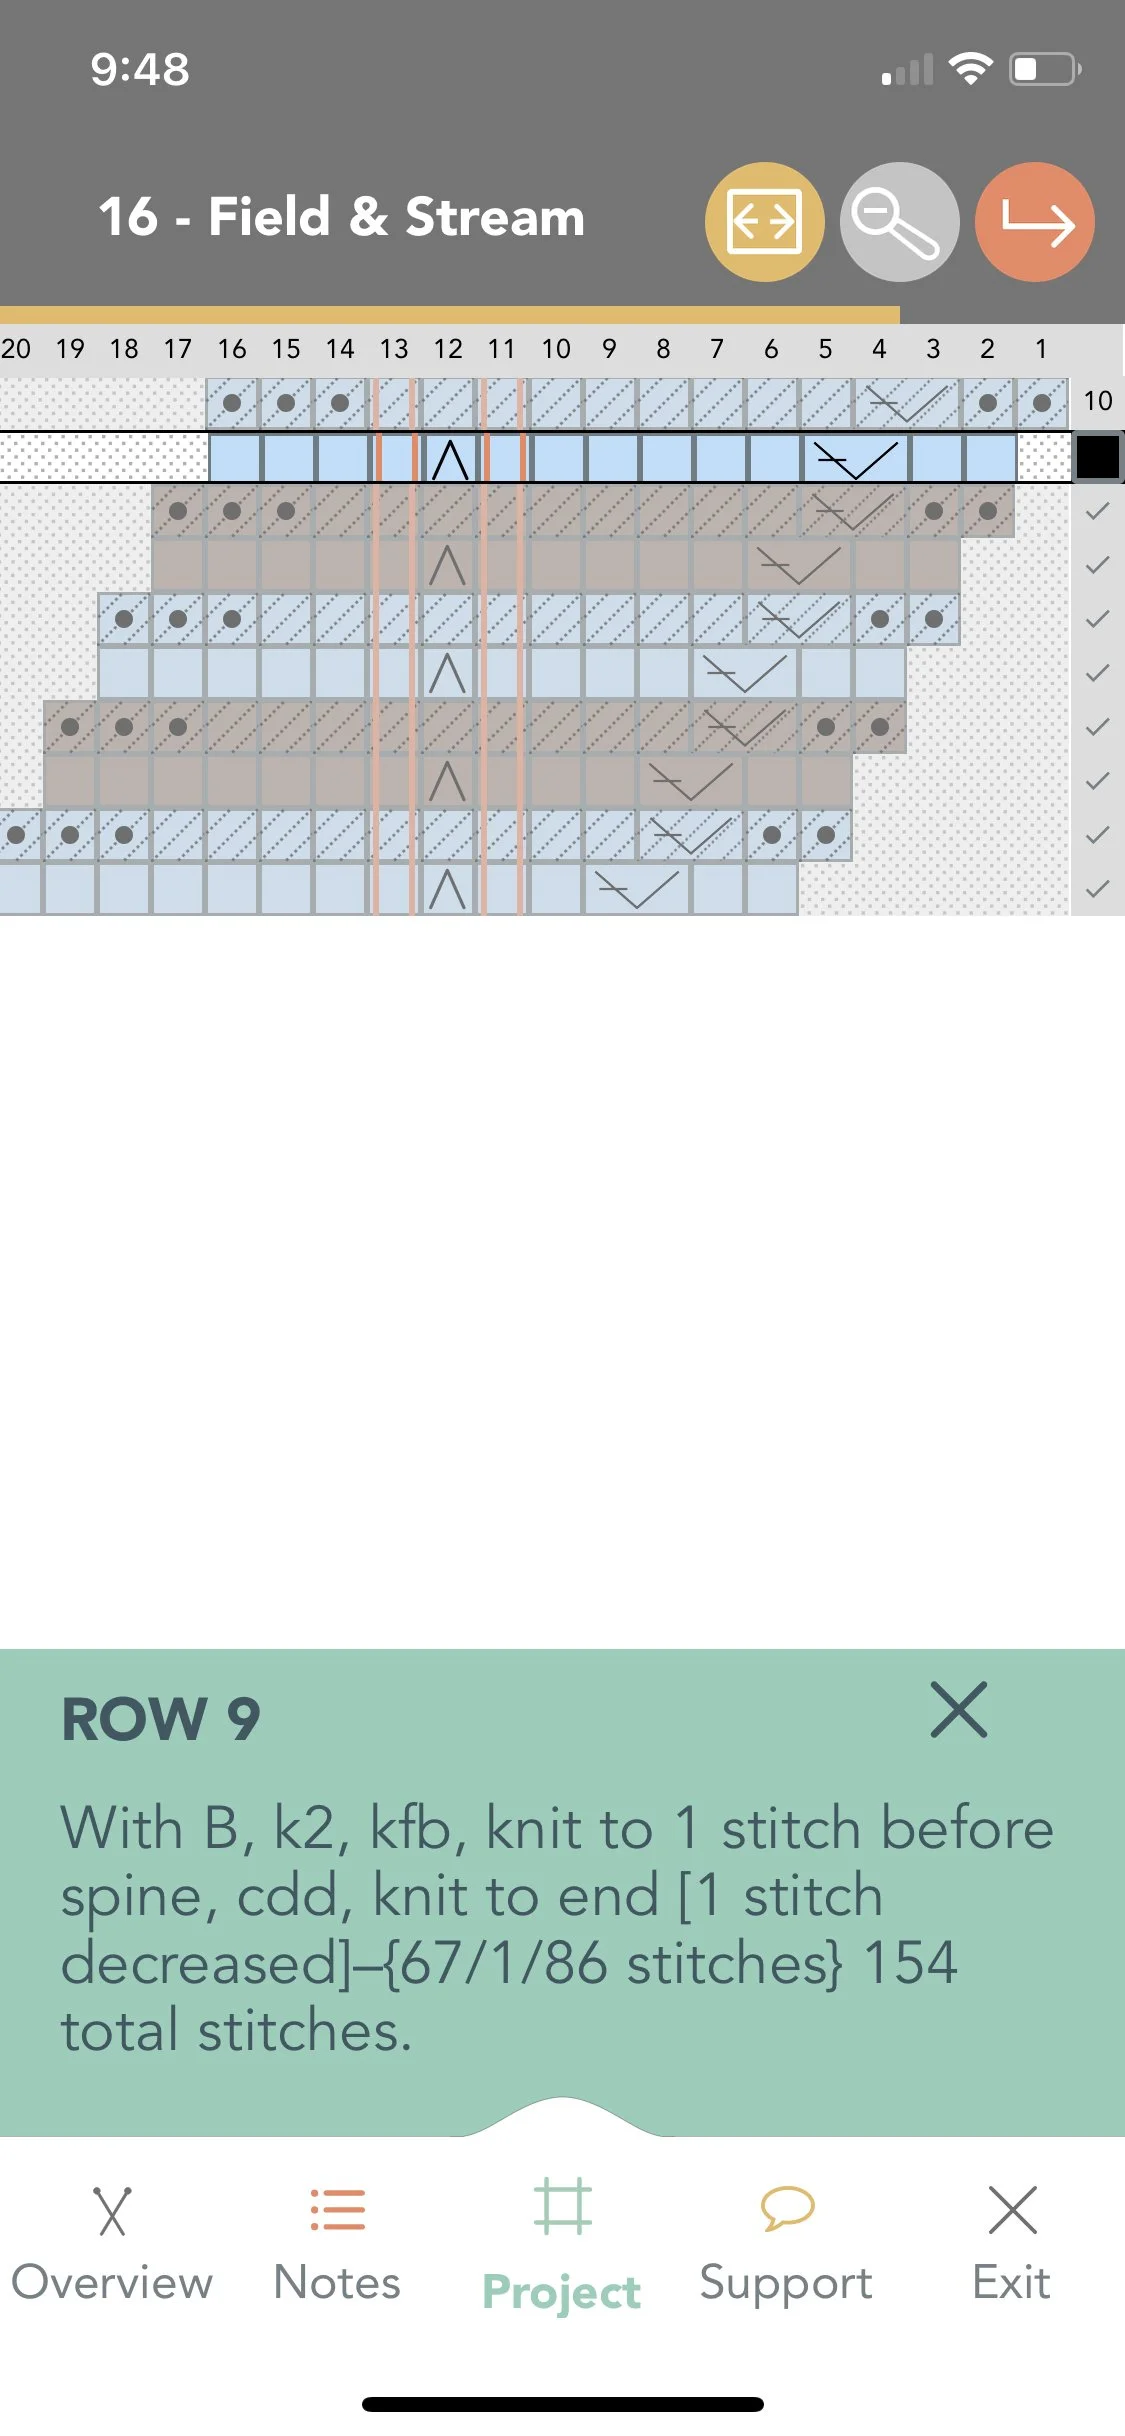
Once you reach the widest part, you’ll create a vertex by ceasing the increases on one side. This shifts the stitch counts as you go and the CDD moves toward one edge, while the opposite side edge continues to elongate. Note that we provide stitch counts for these sections using a shorthand notation in curly brackets, like {67/1/86 stitches}, where 67 is the number of stitches on the decreasing side (the end of the row when looking at the right side of the work), 1 is the CDD, and 86 is the number of stitches on the increasing side (the start of the row when looking at the right side of the work.)
Once the CDD reaches the edge of the fabric, you’ll bind off dramatically, creating a triangular shawl. Block your work with pins or blocking wires to smooth the edge where the bind off occurs. Take a look at the annotated photo in the Blocking section for more.
Managing the Marker
In this pattern, you’re instructed to place a marker in the central double decrease stitch itself (central spine) and move it up every few rows. The video for the CDD shows this. In the pattern, you’ll read intstructions like “knit to 1 stitch before spine” and the CDD spine stitch will be the middle stitch in the CDD.
If you’re like Alison and prefer to have a stitch marker on your needle and hate moving things with your fingers, you might like to try this alternative. However, you should note that with this method, your reference point is slightly shifted. You’ll still work to 1 stitch before the spine, but it’s 2 stitches before the marker.
Right Handed Version
Left Handed Version
Blocking
As always, blocking proves to be a critical step to project completion! To smooth the edge of your shawl into a triangle shape, we recommend using blocking wires with T-pins.
But even if you don’t have T-pins or blocking wires, block your work by submerging in cool water, then laying flat to dry and stretching to the shape you want your final object.