Freedom Knitters Tee
This article provides additional tips for the Freedom Knitters Tee, available only in Knitrino. As always, if you have any questions, feel free to get in touch using the envelope icon at the bottom of the page.
If you need help getting started with Knitrino, check the Quick Start Guide, or find out more about Reading Knitting Charts.
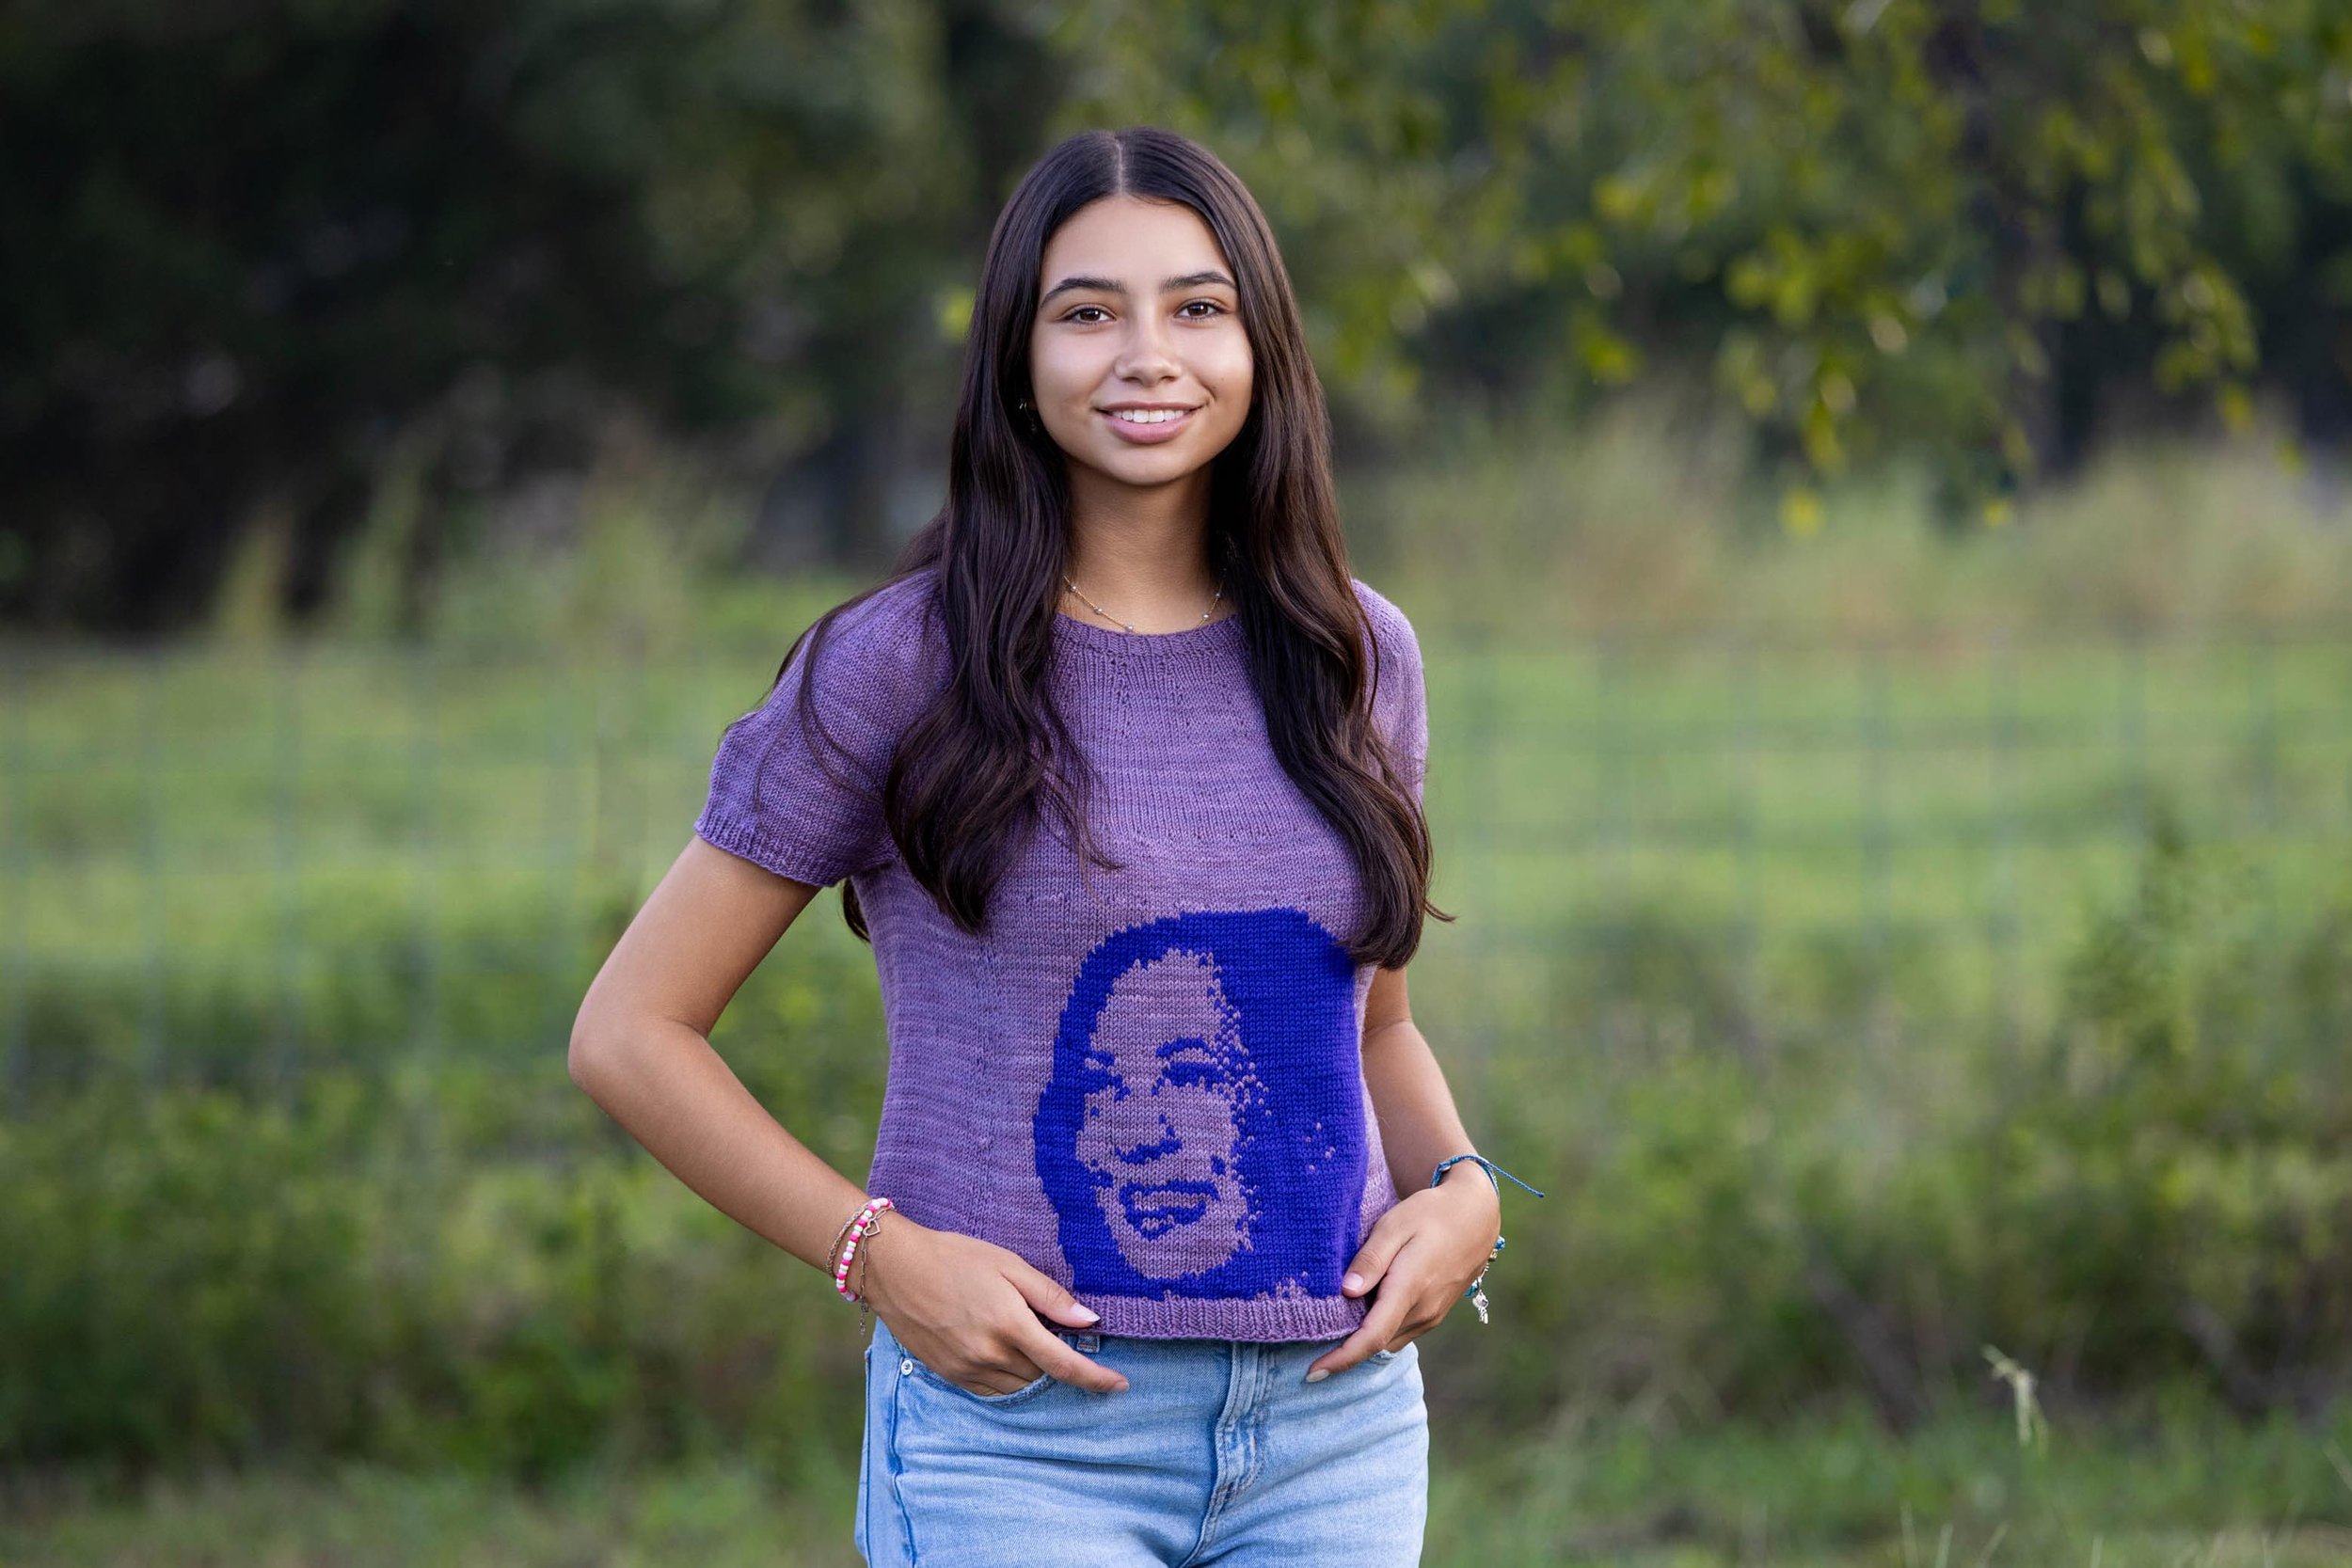
The tee in Queen City Yarn's Latta base (Teal Feather and dark grey) in size small, shown with about 1" of positive ease.
The tee in Queen City Yarn's Latta base (Thistle & MVP) in size medium, shown with about 5" of positive ease.
Fit & Ease
The Freedom Knitters Tee is designed to have anywhere from 2-7” of positive ease (in other words, it’s designed to be 2-7” larger than your body.) The size you choose depends on how you like your garments to fit. In the photos above, we show the size small and size Medium on the same model. Note that as the size increases, yoke depth does too, and thus, overall length.
Modifications
You can easily modify the tee to suit your needs!
To Lengthen/Shorten
If you need to add or remove rows, the best places to do so are
the middle yoke section (which obviously also lengthens the yoke depth)
after all the increases and before the body
at the start if the hem section.
Note that our level of yarn consumption at gauge using Queen City Yarn’s Latta was about 158 stitches per gram of yarn. (You can use our number as an estimate or calculate your own consumption rate.) For a rough estimate of yardage requirements, here’s how to estimate how much extra yarn you’ll need for say 20 extra rows on the body of the 2XL.
(1) Take the body stitches in 1 round, and divide by the yarn consumption rate:
290 body stitches per round / 158 stitches per g = 1.8 grams of yarn per round
(2) then multiply by the number of extra rounds you want to add:
1.8 grams of yarn per round * 20 rounds = 36 extra grams of yarn
To Make Long Sleeves
Most people will want to go down to around 7-9" at the wrist. To make long sleeves using the size Large as an example:
(1) take the # of stitches at the upper arm: 76 stitches for the large
(2) take your desired wrist circumference, let’s say it’s 8" (at a gauge of 5.5 stitches per inch): 44 stitches
(3) decide how long your sleeves should be and estimate the number of rows. You’ll probably want a sleeve length of round 19" before the cuff (at a row gauge of 7.25 rows per inch): around 138 rounds
(4) decrease linearly from the underarm to the wrist. You need to decrease 32 stitches over 138 rounds. Since you’ll most likely be doing 2 decreases every decrease round (one at the start and one at the end of each decrease round) you’ll want:
138 rounds/16 decrease rounds = 1 decrease round every 8.625 rounds, rounded down to 8 rounds.
(5) then add a 0.75-1" cuff: around 6-8 rounds of ribbing.
Estimate yardage: In this example, you’d be adding about 16,000 stitches give or take, which at our consumption rate (158 stitches per gram) will take about another 100g+ or an extra skein of yarn. And that’s about right. Typically, you can estimate that long sleeves are about 1/3 of the total yardage of a long sleeve sweater.
Creating the Image after Knitting with Duplicate Stitch
We recommend most knitters make their tee, and then use duplicate stitch to add the image to the center front of the tee. The first video shows how to use Duplicate Stitch for right handed knitters, and the second, for lefties.
When working duplicate stitch, don’t constrain yourself to working across a single row. Instead, work in chunks. We recommend doing the hair on one side, then float over and do the other side… In this image of another project featuring the Knitrino Logo, you’ll notice Andrea didn’t move her gold yarn across the long gaps on a single row, instead, she zig-zagged up the small chunk of color (shown by the pink arrows.)
The inside of the work for a project created with duplicate stitch. Don't work across long gaps, but instead work in chunks of the same color.
Creating the Image while Knitting with Ladder Back Jacquard
For advanced knitters who are comfortable improvising and going off script, we’ve also included an upside down version of the chart that can be used to add the image while knitting. If you have questions on how to do this, it’s probably best to stick with duplicate stitch, as all of this is outside the scope of the support we can provide. While LBJ isn’t difficult, like most things, it takes practice, and you may not be pleased with your results on your first go around.
Ladderback Jacquard (LBJ) is a really fun technique for stranded knitting when you have consistent rounds with long floats. It's an alternative to locked floats: it lets you keep these floats tidy behind the work. To use LBJ on this project, you’ll be joining and cutting your contrasting color each round. You’ll want to anchor the joined color on each side of the image (when you join and when you cut.)
The anatomy of LBJ is this:
You create an invisible foundation stitch with a Right Lifted Increase
You work the ladder stitches by purling your "resting" yarn on the ladder stitch
You close off the ladder invisibly with a knit 2 together
A few additional considerations:
Create your foundation stitches at regular intervals, like every 5 stitches across the work.
You typically do not need to lock your floats when using Ladderback Jacquard.
Because the LBJ parts are free floating inside the work, we recommend (a) anchoring your work each time you join and end and (b) pulling your LBJ stitches much tighter than you would when stranding. Some knitters may find that they need to go DOWN a needle size once they get into the LBJ section of the pattern. It all depends on how you knit.
The Foundation Stitch
Create your foundation stitch with a right lifted increase.
Right handed knitters: Insert your working needle into the right half of the stitch BELOW the next stitch and place it on the holding needle. Knit the loop with color A. Knit the next stitch with color B as normal.
Left-handed (mirror) knitters: Insert your working needle into the left half of the stitch BELOW the next stitch and place it on the holding needle. Knit the loop with color A. Knit the next stitch with color B as normal.
Ladderback Jacquard
Work the Ladderback Jacquard by bringing both yarns to the front of the work and purling the ladder stitch with the resting color (in this case, it's color A). Then return both yarns to the back.
If you stumbled across this page and have no idea what we’re talking about, it’s the Freedom Knitters Tee, only in Knitrino! Take the tour or get this project by scanning the QR code or clicking the link from your phone.


