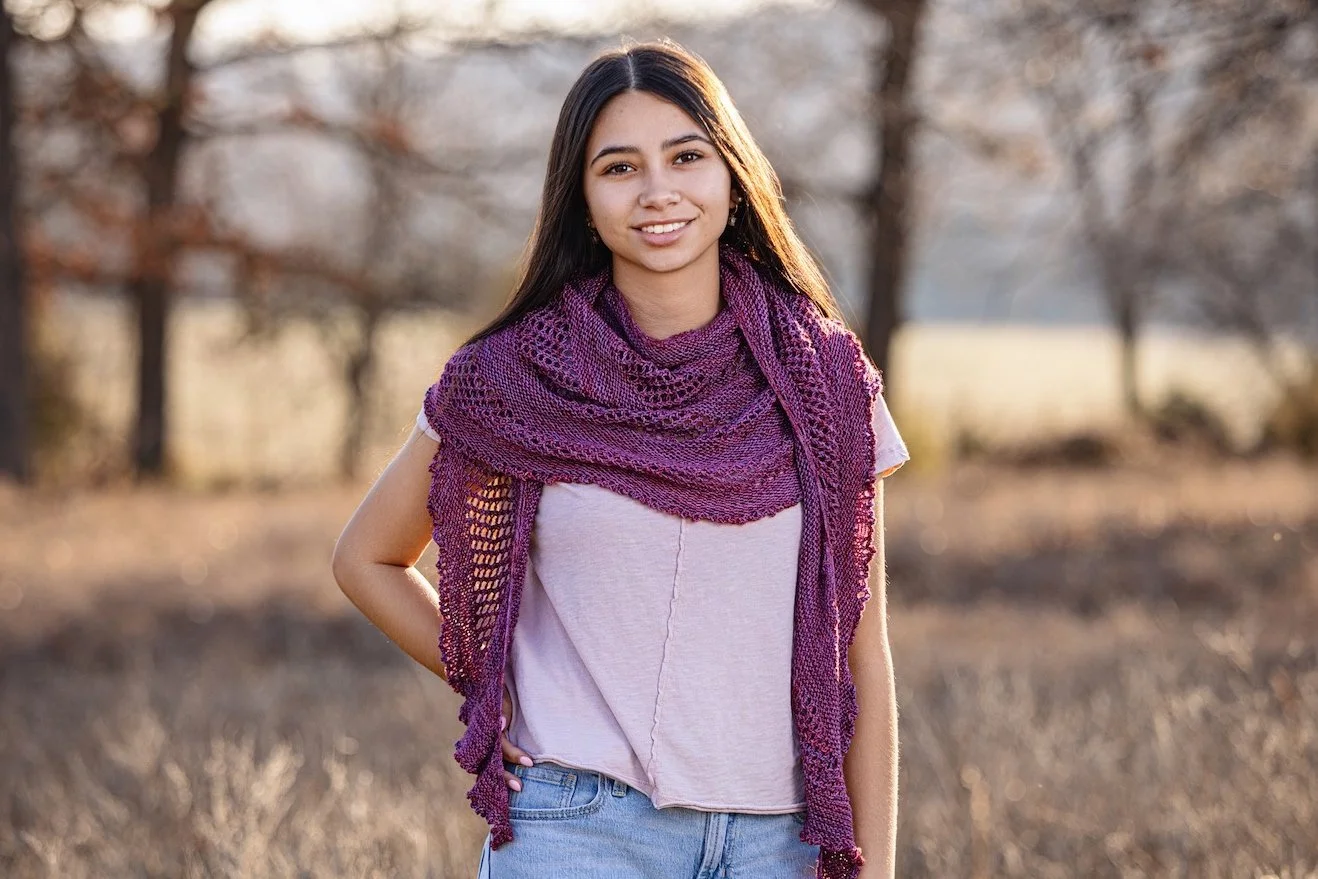
Moonsong Shawl
This article contains tips for Moonsong Shawl, the stunning new shawl from Knitrino. Don’t have the project yet? It’s available for a limited time in Knitrino–click the button below from your phone to find out more.
As always, if you have any questions about this project, please email us at support@knitrino.com.
Table of Contents
Getting Started with Knitrino
If you're new to Knitrino, check out the Quick Start guide for short videos that show you how to use Knitrino. Those new to chart knitting may wish to review our full blog post on Reading Knitting Charts.
Reading the Charts when Working Back & Forth
When working flat or back & forth, you read the chart like a zig zag. When you work across the front of the work (odd-numbered rows), you read the chart from right to left. When you work across the back of the work (even-numbered rows), you read the chart from left to right. This is just like what you’re doing in the physical world. You work your knitting across the front then turn your work and work the opposite direction across the back. (Note: both right-handed and left-handed mirror knitters should read the chart the same way. For right handed knitters, it matches how you’re working. For left handed knitters, your work will be mirror image.)

Now, when you work a knit stitch on a wrongside or backside row, that looks like a purl stitch on the front-think of garter stitch! So a knit stitch on an even (wrongside/backside) row, will appear like a purl stitch on the chart. But it will also be hashed to remind you “This is a backside row.”
Fore more on reading knitting charts, take a look at our full blog post on Reading Knitting Charts.
A Few Notes
This is a shawl that’s very forgiving of mistakes! If your gauge is off, or you’re missing a stitch or two, no frogging is required.
Don’t worry too much about your gauge, as long as it’s somewhere in the vicinity of the listed gauge and you have at least 800 yards/730 m of yarn, you should be fine.
Expect your lace gauge to be much looser than your garter stitch. It might not lay flat while working the shawl, but blocking makes a world of difference.
If you find that you’re short a stitch at some point, you don’t need to worry too much about finding it. Just add in an extra increase at the row end. Voila!
The one place where precision matters is in keeping your lace aligned, as described in the section below.
Short Rows
Short rows are a great technique to insert extra rows into only part of a garment or object. They're often used while knitting in the round to raise the back of a sweater or neckline, or to create curvature for heels (and other curvy body parts). They might seem intimidating, but don't let that stop you - if you can knit you can work the short rows in this shawl!
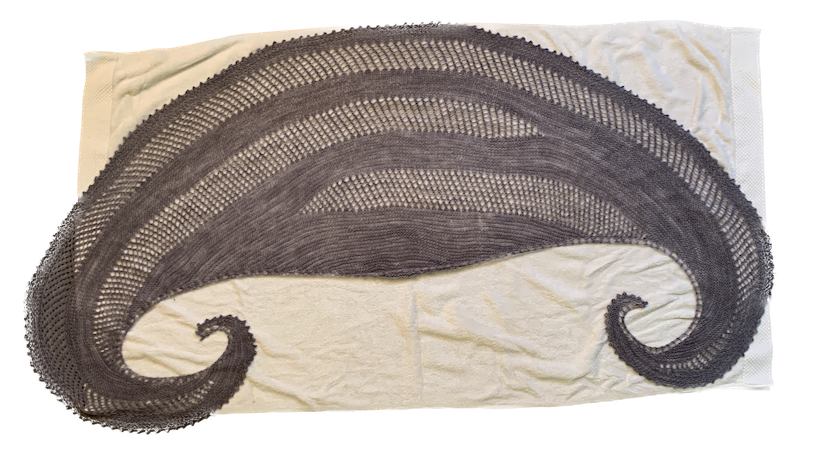
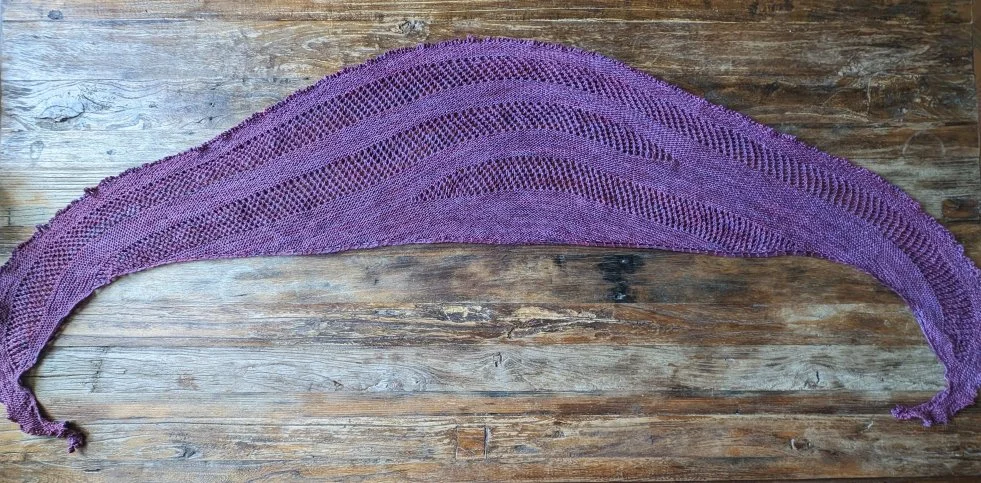
In this design, short rows are used to insert lace into the shawl, and to build up the crescent shape of the shawl. In Section 10, we work the eyelet lace across only 60% of the stitches, then we knit 1 stitch, and wrap the next stitch to keep the stitches snuggling up to each other, then turn the work for the next row. (Note: often these wraps are “resolved” later by working the stitch & the wrap together like a k2tog, which makes the wrap far less visible. In our case, though, we don’t need to resolve the wraps because there’s garter stitch surrounding the short rows - the wraps just blend right in!)
On the first lace section, the short rows are on the right side (odd rows). On the second lace section, the short rows are on the backside or wrong side (even rows). The final lace has short rows on both sides–or in other words, there’s a wrapped stitch every row.
Here’s how it works:
Right Handed Version
Left Handed Version
Keeping Your Lace Aligned
When working the lace, make sure you’re always knitting into the yarnover then the k2tog from the prior lace row (2 rows down.) This video shows what it should look like!
Alternating Skeins
To alternate skeins, bring the new yarn over the old yarn. Always wrap in the same direction, and the old yarn will get trapped by the new yarn, creating a tidy edge.
Picot Bind Off
To work the Picot Bind Off, go down 2 needle sizes. (We went from a US 5/3.75 mm to a US 3/3.25 mm). Then: [Cast on 2 using the Knitted Cast on, bind off 4 knitwise, transfer remaining stitch from the working needle to the holding needle] repeat these steps to the last 2 stitches, cast on 2, bind off 3. Cut yarn and draw through the last stitch.
Blocking
As always, blocking proves to be a critical step to project completion! Block your work by submerging in cool water, then laying flat to dry and stretching to the shape you want your final object. We recommend stretching the lace in all directions with your fingers.